Building PVC rockets 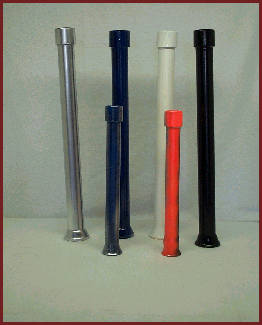
Step 1: Cutting pipe to length When making rockets for 1.5” barrels, it is best to use 3/4" PVC. I cut mine to a length of 10 7/8”, I make them this length because that is the distance from the end of the table and my saw blade, so your lengths can vary slightly, but always try and stay above 10” and below 12”. For a 2” barrel you will want to use 1” pipe cut to a lengths between 16” and 18”, mine are 17”. You can use any method of cutting you would like, however, try to have as square of ends as possible.  
I will usually cut 20’ of pipe at a time, it’s a lot of work to make rockets, and so I like to do as many at a time as possible. 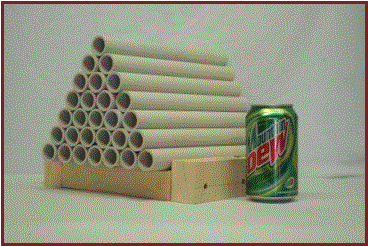 
Step 2: Washing the pipe
It is best to wash the pipe after cutting it, this will remove any dirt and PVC shavings that have collected. 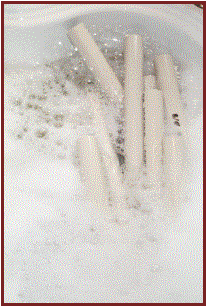
Step 3: Drying the pipe After you have cleaned the pipe, you want it to dry completely, inside and out. You can do this be either letting it air dry, or drying it yourself with a towel. Here I am letting some pieces air dry. It is very important that you get the pipe totally dry; otherwise as soon as you put the pipe in the oil, the water will boil off and send very hot oil all over the place, not fun to get on your arm. 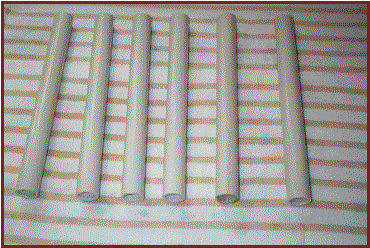
Step 4: Preparing to flare the pipe You will now need the following materials to begin the flaring process: From left to right: Metal pan (pie pan, anything to help catch spilled oil) metal funnel (plastic will work too, but might warp if it gets too warm) cooking pot (Yes, your wife/mother/girlfriend will get upset if you use that pot, go to a garage sale and by a cheap one) small piece of pipe the same size as your intended barrel, cooking oil. Other things that you may want handy include, an oven mitt, bowl of ice water, and towels. 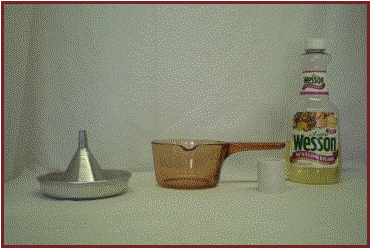
Step 5: Setting up Start by pouring oil into your pot, about an inch will be enough. You may have to add some or take some out as you go, so have something you can pour hot oil into handy. Here you can see that I have everything ready, a bowl of ice water, funnel and drip pan, my soon to be missiles, and my pan of oil is being heated. You will want to test the temperature of your oil before you get started. Do this by holding a piece of PVC in the oil for about 30 seconds, if it gets very flimsy and pliable, the oil is hot enough, if not, turn up the temperature. 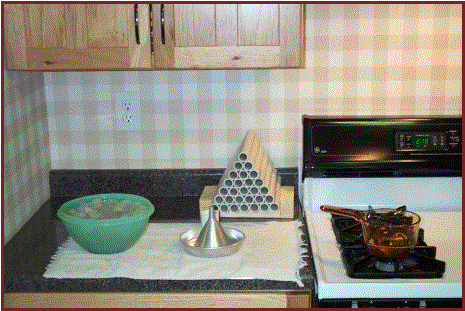
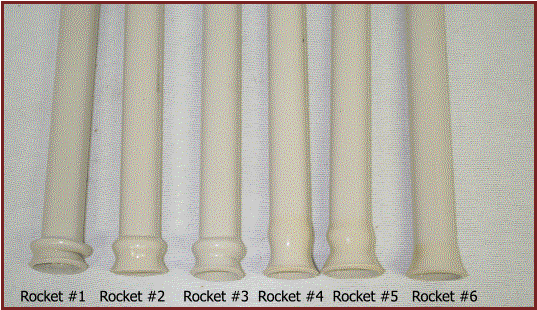
Step 6: Flaring Now that your oil is hot you are ready to begin. Start by putting your small barrel sized piece of pipe on the funnel, this will act as your stop for the flare. With an oven mitt on your hand, hold your first piece of pipe in the oil for roughly 30 seconds. (Time will vary according to the temperature of your oil, experiment with different times.) Make sure to continue holding the pipe the entire time that it is in the oil, otherwise it may tip over and send hot oil everywhere. After the pipe has become pliable, quickly remove it from the oil and push it done on the funnel. With your flare stop in place, you should only be able to push the pipe down so far, don’t push any farther. If you can push the pipe down all the way to your flare stop, your pipe isn’t hot enough yet, put back in the oil. Lets now take a look at some different problems that may occur when flaring. - Rocket #1: Pushing down too hard and too much oil in the pot.
- Rocket #2: Too much oil in the pot.
- Rocket #3: Too much oil in the pot and not pushing down straight.
- Rocket #4 and #5: A little too much oil and still pushing too hard.
- Rocket #6: Correct amount of oil and correct pressure applied.
Step 7: Gluing end caps Once all of your pipes have been flared, you are ready to begin gluing on your end caps. 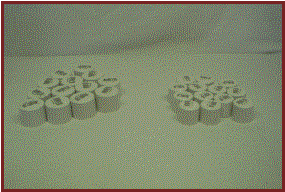
Here I have sorted out my 1” caps and my 3/4" caps. Because you are attempting to build PVC rockets, I am going to assume that you already have built a cannon and therefore you know how to prep and glue PVC. But before you glue on your end caps you may want to add some weight to them. I have found that a couple (3-4) washers inside of the caps work the best. However others have tried lead shot, experiment to see what suits you best. 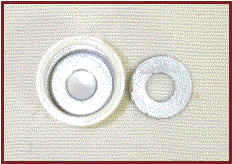
Here is a picture with a washer inside the end cap. Once your weight has been added, you can glue your caps to your flared pipe. Remember: You don’t need to use any primer because these will not be holding any pressure, so don’t worry about it. Step 8: Painting (Optional) You should now have missiles that look something like this: 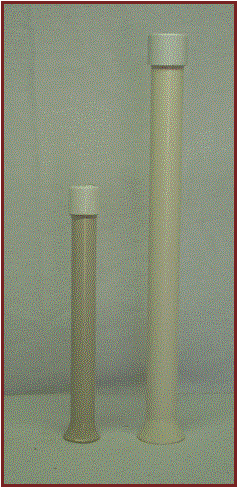
Now you may want to add some paint, it helps with visibility in the air, and also helps when trying to find these rockets. I usually use a bright colored spray paint. 
You may also want to build a simple paint block to keep your rockets upright while painting. I simply put a couple screws in a 2x4 and put the missiles on the screws. 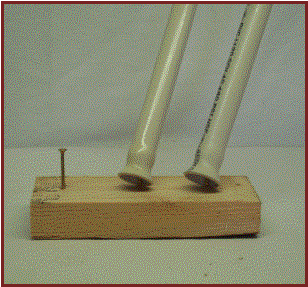
And now you are done. Enjoy, and as always, Keep it safe… This How-To has been written by Tim Brown. Please email me with any questions or comments you may have at HowToGuy@hotmail.com
document created 7/23/2002 10:26:46 PM;
last modified 11/28/2002 1:45:48 AM
| 
 Increase accuracy and safety with new rifled barrels!